RDS Learning and support
Step 1
Set the image size: Test the image in RDS by publishing it temporarily and adjust the size to find the best fit for the toolkit. The one in this example is set to 700px wide. If you use MS photos or similar to open images on your device you will find a “resize image” option in the toolbar or menu options.
Save the image to your OneDrive in your chosen size and upload it to the RDS media files in the appropriate folder for your toolkit. This is the image you will use to create the image map, adjusting size at a later stage can throw the map off.
Step 2
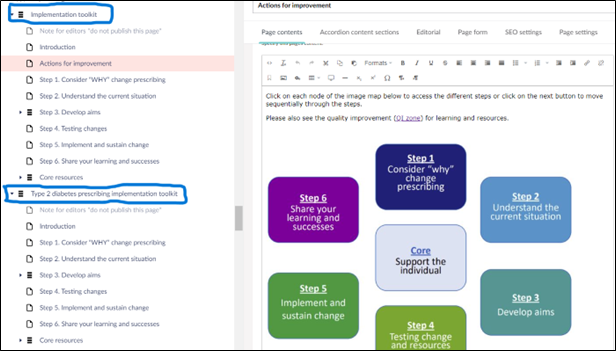
Create and publish all the pages the image map will link to in your toolkit first, including the page where the image map itself will sit. You will need the live URLs to create the image map so make sure to publish all relevant pages. The image map will be created last.
Step 3
Open the free online image map generator https://www.image-map.net/
Step 4
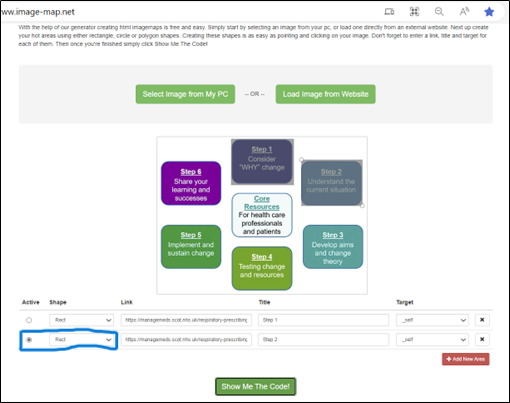
Choose the option “Select image from my PC” then select the correct image file. The image will open on the screen as shown in the screenshot below. Scroll to the bottom of the screen and fill in the boxes as follow:
- Shape: select the appropriate shape to match the section of the image you want to link from. See screenshot below where in this case ”rect” is selected (circled in blue). To create the shape you have to click on the screen at separate points e.g. for the rectangle click on one corner then click at a diagonally opposite corner – it’s not a click and drag function like a normal shape selection tool. Once the shape is created you can click and drag to resize.
- Link: Paste in the url to the live page.
- Title: Add an appropriate title – the step numbers are used in this example
- Target: select ”_self”.
- Note: This is important - you can’t generate the code without it.
Step 5
Click ‘Add new area’ then select the appropriate ‘active’ radio dial button and repeat the process above for every section you want to link from the image. Only steps 1 and 2 are shown in this example. The active radio dial button must be selected for each new area in order to create the shape on the screen.
Step 6
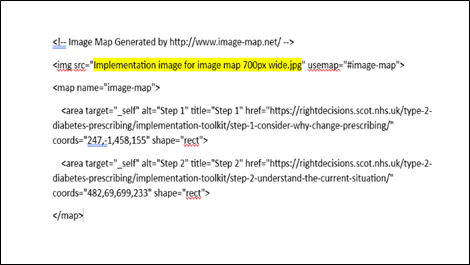
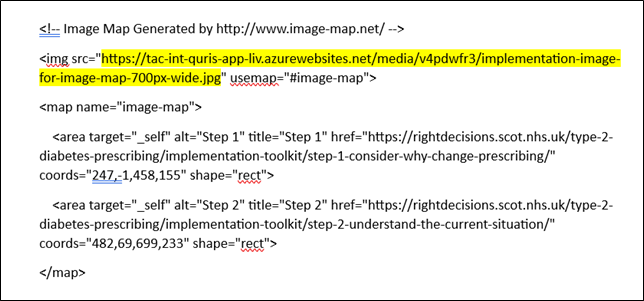
Once you have added all the areas select ‘Show me the code’. The code will appear in a pop up and you can select and copy it. A red and white barrier sign will appear but you can still click and drag to select all text or click on the box then use Ctrl+A. Copy the text (Ctrl+C) then paste (Ctrl+V) into a blank Word doc. The code will look something like the image below and the highlighting is explained in step 8.
Step 7
Now open RDS media and locate the image you want to use. Click on the name of the file to open it then click on the ‘i’ button at the top right of the screen (see image below). This opens information about the direct link code for that media file. Right click on the link itself then choose ‘copy link address’ as shown below.

Step 8
Paste the link into the Word in the highlighted section between the quotation marks so that it replaces the original content. You can see in the image below that the code is now different from the original one above in step 6.
Step 9
Now select all of the code in your Word doc, copy it and paste it into the source code in RDS in the page where you want the image to sit. Save and publish and check it all works on the live page.